Saturday, August 27, 2016

Asteria Sparkles

Welcome to Passionate Paper Creations! 

Lysa here, and I am SO excited to be here.
My card today is part of the Art by Miran sponsored weekend of fun over on the
Passionate Paper Creations & Friends Facebook Group!


I made my sparkly card using Asteria from Art by Miran combined with Creative Basics dies. 


I had so much fun coloring all of that fabulous hair and her dress! I die cut the smallest Basic Stitched Flags die by Creative Basics and stamped the sentiment from the Amazing Girls Sentiment set by LDRS Creative. I added a doily for a little something extra and mounted it all on a glittered card stock on the card base. I finished off my image by adding a bit of sparkle on the stars in the background using a Spectrum Noir sparkle pen in clear, and glossy accents on the pearl necklace!

Copic markers used: 
skin: E000, E00, E21, R01; hair: E25, E27, E29, YR23; eyes: G20, G21; 
dress: BG10, BG11, BG13, BG15, BG18; background: C1, C3, RV00, RV02

Have a FABULOUS weekend!


Thursday, August 25, 2016

Power Poppy On The 5's New Digi Release


Welcome back to Passionate Paper Creations!  This is Rhea again sharing a NEW DIGI from Power Poppy! Cup Of Buttercups is just adorable isn't it?  I created the card using my die line Creative Basics.


Of course I didn't color them like Buttercups....that would be expected, now wouldn't it :)
The design of the card was inspired by a friend of mine Shelley who is on my Personal Design Team. She is quite clever and creative but I put my own twist to it.

Here is what I used to create this card:
Power Poppy - Cup Of Buttercups
Creative Basics - Fancy Rectangles (tag)

Here is the color Palette:

Thanks for visiting today and to see more inspiration from the designers at Power Poppy jump over their blog HERE


Monday, August 22, 2016

Fancy Squares Shaker Card

Welcome back to Passionate Paper Creations!   Jessie  here today with a fun shaker card using the Candibean Blossom Girl stamp from LDRS Creative and Creative Basic Dies


I love the new Fancy Squares & Little Things Die from Creative Basics, you can find all the Creative Basics Dies here. I used the largest Fancy Square to cut out the Chevron patterned paper, and a piece of acetate, I used both the largest and smallest Fancy Square to cut out the teal frame to hide the foam tape. once I had the teal frame adhered to the acetate I put foam tape all the way around it and filled it with sequins then adhered it to the patterned paper, and there you have a darling little shaker element to adhere to the card. 

Lets see your shakers with this awesome die!
Thanks for stopping by
hugs!


Friday, August 19, 2016

Bluebell Parade

Welcome to Passionate Paper Creations
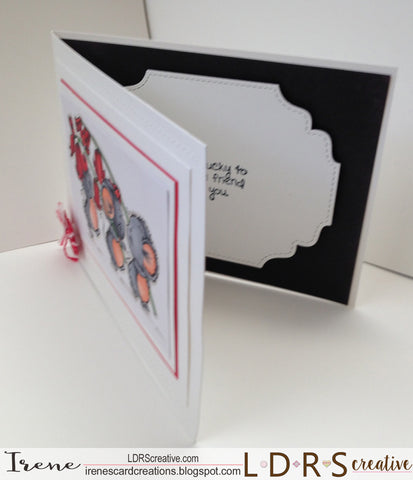
Irene here today with my very first post for PPC blog. So excited to be here..
Today I picked Candibean, Bluebell Parade to color from LDRS Creative as well as Creative Basic Dies.


I used:
to do the border along the edges of top and bottom.
Make sure you put just a tiny piece of tape on both ends so
 it doesn't move around.


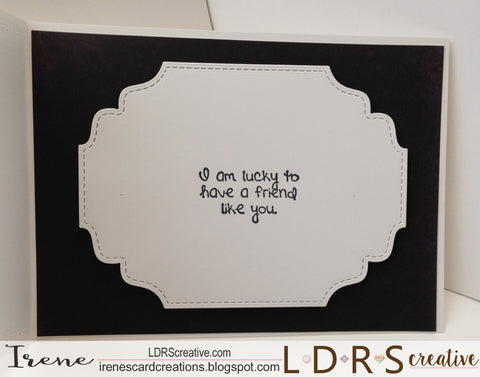
to pop inside and used the sentiment


inside of card

Printed on X-Press It Paper
Colored with Copic Markers
Have a great day

Thursday, August 18, 2016

Harvest Creation

Good Morning, Dorinda here with what's the beginning of  my Christmas cards.

Using:
DoveArt Studios Harvest Wreath
Creative Basics Basic Stitched Flag
Creative Basics Quilt Embossing Folders


I colored this up with my copics, then cut out the image using the large die in 
Fancy Things & Little Things Die Set. Inked while still in the die.
The image frame was created using the half die; running it through one way,
then flipping and running it back through.
Using the Quilt Embossing Folder gave the frame a a nice dimensional patterned look. 
I then adhere my background papers to my card base. Place the half die where I wanted it and run it through; creating the pop up.
Attaching the image piece and I'm half way there.
With the Basic Stitched Flag, I cut out a piece with the smallest size.

I added a few I am Roses blooms but something was missing.
Ah Ha!! Using the button and sets tag, It was ready to go.

copics used:
grapes: BV08, 04, 02
holly berries: R39,35,32
raspberries: RV69, 66, 63, 02
leaves: G29, 17, YG03, YR27


Saturday, August 13, 2016

Bloobel, Giggles


Welcome to Paper Passionate Creations
Corinne here today and I am using, 
OMG... she is one of my Favorite images from Bloobel
she is such an awesome image.. 


Using Copic Markers
R20, 35, 37,39
N2,4,6,8,10
E000,00,11,51 BV20

Basic Cutting Edge Borders I

and 

LDRS Creative Dies

Majestic Frame Die Set

Hugs

Friday, August 12, 2016

Crazy Fun With Bloobel!


Welcome back to Passionate Paper Creations!  Rhea here today to announce and share!
It's all about Bloobel Stamps this weekend over at Passionate Paper Creations and Friends Facebook Group!  We have a fun coloring contest and games with chances to win Gift Certificates to Bloobel Stamps Store! These are some of the funnest images to color and giggle over!

If you have any sense of humor you will have so much fun this weekend!  If you know me at all you know I am a nut!  So these images are right up my ally!

Here is Bureau Of Complaints available HERE


I'm sorry but this reminds me of so many older men that have been married for a very long time!
They have a tendency to to block out their wives talking all the time.  hahahahhahahaha
Now, Jeff and I are just getting ready to celebrate 7 years together and he already does this.  My Dad does it to my Mom, like....ALL THE TIME!  Mom will snap at him and say "John", and he will get the goofiest look on his face on purpose.  I swear he cracks me up every time.  I know Mom is laughing on the inside as I am belly laughing out loud.  It's the best!!!!

Ok for what other goodies I used
From My Creative Basic Dies and Embossing Folder Line

Here are the colors I used...feel free to pin it!

HEY, see you over at PPCF ( Passionate Paper Creations and Friends Facebook Group!)


Monday, August 8, 2016

Creative Basics Dies are Versatile

Welcome to Passionate Paper Creations!

Shelley here today to share one of my latest creations with the fabulous Creative Basics dies and Embossing Folders.


I used:
Basic Stitched Flags (I'm hard-pressed to NOT pick up this die set lol)

There is a half square in the Fancy Squares & Little Things set that is meant to create an easel (or flip fold) card but it also doubled as an extra mat behind my image.  Why?  Well because I'm sure I'm not the only one who "prints first and asks questions later" lol.  I never plan ahead for what I want to do with a design.  Not the colours, not the paper and I guess... certainly not the dies and image size.  I'd like to say that will change but I'd be lying.  I just cut a piece of cardstock to fit the size of the half square, doubled, ran it thru my die cutting machine once, then flipped the die and lined up the sides and ran it thru again.  Voila, instant larger mat!  And if you get it very slightly "off" at the joins, just use embellishments [wink].

I also ran the Picnic Quilt Embossing Folder thru twice on my cardstock so I could get a bigger piece.  Easy peasy with a little lining up/maneuvering!

Image printed on X-press It Blending Card and coloured with my Copics:
Skin - BV00-E11-21-51-50-93; R20-E04
Eyes - Y11-E23-29
Hair - E43-50-53-37
Pillows - E70-71-74; E08-09
Shorts - B91-95-97
Shirt - V01-04-06
Book Pages - E40-41 + Black Multiliner
Glasses - V04-09; BG0000
Books - YG95-97-99; BG70-72-75; RV91-95-99

Image - Angels Hearts and Memories, Bookworm Angela

Thanks for stopping by! 


Friday, August 5, 2016

Power Poppy On The 5's - New Release


Welcome back to Passionate Paper Creations!  This is Rhea!!!
It's time for Power Poppy to have another digi release!

This Image is called Apples In Season


Seriously who wouldn't love a fresh ripe apple right off the tree!
This was a great image to color with my Copic Markers.
We live around so many orchards I can hardly wait for all that
comes with apple picking time!  I think Apple Cider Slushies have
become my favorite!  Don't say gross, like I did until you have one.
The problem is...you want more!

There are so many different kinds of apples.  Which means you could color your image in many different ways.  What about green apples, or yellow apples with a touch of peachy red to them?

Here are the colors I decided to use.....feel free to pin and save!


But wait!!!  Want to see more inspiration from the team?
Allison Cope
Cindy Lawrence
Julie Koerber
Kathy Jones
Katie SimsMarcella Hawley
Stacy Morgan
Cheryl Scrivens
Rhea Weigand-hey that's me
Debbie Olson
Barb Walker
Nancy Sheads


Thanks for stopping by and I will be back soon with more inspiration!  I hope you enjoy my Design Teams Inspiration here at Passionate Paper Creations!  Don't forget to join Passionate Paper Creations and Friends Facebook Page!


Wednesday, August 3, 2016

Blossom Girls

 Welcome back to Passionate Paper Creations!
Corinne here today with my newest project
I have used one of the new Candibean Blossom Girls.


I used the new awesome die
I cut it just off the edge so it made it into an adorable little card.
I also used the tag piece that goes with them to put on either side of the black oval under her. just gave it an extra design to the shape.


I used the
to cut out my image.. she just fits perfectly into it.
then I used the
I actually cut them apart to fit them where I wanted them on my little card.


Colored with Copic Markers and printed on X-Press it paper
E000,00,04,11,51,R20
N3,5,7,9
BG01,05,07,09

Hugs

Monday, August 1, 2016

Crafty Cat Tag


Welcome back Ruby here featuring NEW Creative Basic products!!

Today I'm showcasing a NEW Saturated Canary rubber stamp from LDRS Creative. I colored her with pencils on kraft paper.

The creating process was pretty quick and fun.

Many NEW Creative Basic Dies went to use for this tag.

I started with my Stitched Flag die to use as a base that I also used the on   NEW Creative Basic Picnic Quilt Embossing Folder for a cool texture.

I tucked in a pink dotted stitched tab and stamped my sentiment using NEW Creative Basics Fancy Rectangles & Layers dies
 I then added the pretty dotted butterflies using also another NEW Creative Basic die Dotted Wings.


I think it's brilliant how fast and easy it is to create a sweet tag to give away to a special friend using the Creative Basic Dies and the ideas are just endless.

Thank you for swinging by today and enjoy your day
Ruby 


Sunday, July 31, 2016

Amber and Wendy's Bouquet


Hello welcome back my friends
Ruby here with a double share of Inspiration.
Both of my cards are kept simple and clean. I think that's trending now. I see so many beautiful colored cards with a simple sentiment and like what I like to say "That's all she wrote" lol!!!
Actually that's the name of my blog ha ha ha!
Well let me introduce you to my first card. This is a Saturated Canary rubber Stamp from LDRS Creative. I colored her with Copics and touched her up with pencils for a precise finish.

I used a few cuts using the Creative Basic Dies.
I just LOVE my Basic Stitched Flag die. I pretty much use it all the time.
 I created a pin  with it on the corner and added them with different Design paper for added depth.
At the bottom border a single Basic Cutting Edge border I cut for a nice clean trim.

My next card is featuring CandiBean Rubber stamp Wendy's Bouquet from LDRS Creative. I also colored her with copics .  


I used Cutting Edge Border I to add contrast to the bottom of my card. I love the fun stitched wave that the die gives. I've seen so many different ways of the use of this die. 
the ideas are endless :)


Thank you for stopping by and enjoy your day

You could find all the Creative Basic Dies HERE


Friday, July 29, 2016

Fancy Rectangle Note Card


Hey everyone! Jessie here on the blog today, have you all seen the new Creative Basics Die Release? All the new dies and embossing folders, are of course, swoon worthy!


For my card today I started with the Fancy Rectangles and Layering Die Set, I cut some hill and cloud masks from masking paper and used distress ink and stencil brushes to create the background. 

I then took the die again and cut myself a card base by folding the paper in half and laying the die so the top cutting part of the die was hanging over the edge of the fold creating a top folding note card! It is so awesome that this die makes a great little note card!


I coloured up one of the images from the Aloha Kit from The Greeting Farm with my coloured pencils, fussy cut her out and popped her up ontop of that cute little inked scene. 


Thanks for stopping by,
Hugs,