I wanted to take just a little of your time today to share some quick tips on working with ribbon.
As most of you know we a Stampendous prefer to work with May Arts Ribbon. May Arts Ribbon is really the cream of the crop when it comes to ribbon!!!
You can get more inspiration from May Arts Blog
You can get more inspiration from May Arts Blog
So, let's get started
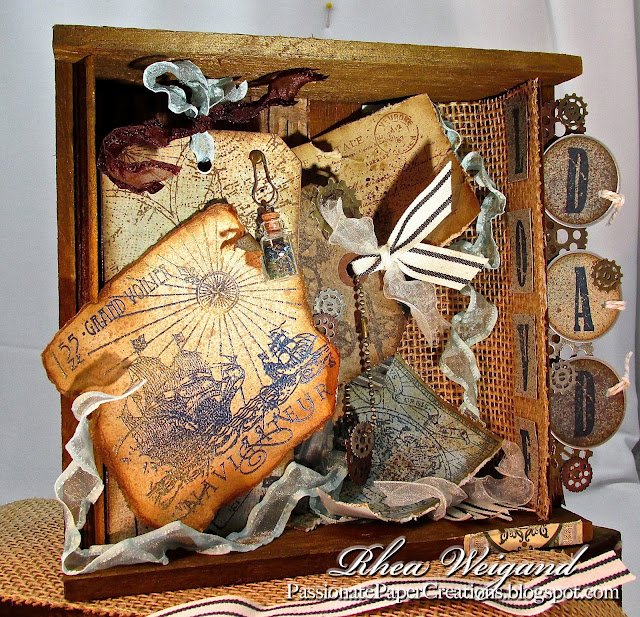
In this project I have used two contrasting colors of organza ribbon with a satin edge, a soft eggshell organza, a very nice canvas ribbon, a touch of neutral twine and my favorite....Burlap Ribbon.
I love altering books, cigar boxes and tomorrow I am sure I will find something else to alter. When doing this depth and texture is everything. Ribbon is the key to the texture in this design.
Let's take a look inside; The entire design has a lot of corners and so did the inside of the box. I wanted to soften and round the inside a bit.
- #1 with the Burlap Ribbon from May Arts. Simply, attach to the outside edge with Sookwang tape (I find this is the best tape when working with wood boxes and burlap). Only use enough tape to hold 1/4" of the the inside edge and secure it. Lightly pull it over the corner and secure it with another piece of 1/4" sookwang tape. Your sharp corner is gone and you have a nice rounded corner with wonderful texture.
You may also notice the ribbon in this box looks a little strange. No it isn't wrinkled. May Arts organza ribbon is amazing to heat with your heat gun! There are a couple of ways to do this
- For the longer pieces of organza ribbon = Tape one end to the table. Pre-heat your heat gun. Quickly hit and release as you go down the ribbon. Be careful so you don't burn holes in the ribbon.
- For the bows on the tags = tie the organza in place and do the same process as above
Check back tomorrow for a full tutorial on how to complete this box for Father's Day as I bring you another yummy tutorial for Stampendous!


2 comments:
What a fabulous project, Rhea! Love all the different elements and textures you combined for this vintage feel! :^) Love the way you did the sentiment, too! And thanks for the tip about heating the ribbon--never heard of that before, but then I've led a sheltered life, lol! :^)
Hugs, Penny
Great project Rhea!! Love that crinkled ribbon!
Post a Comment