Stampendous has a big surprise! The Mice are in the House! Yes, Stampendous has House Mouse in cling rubber and wood mounted. I am so excited I could sweek!!
This week Stampendous and the Design Team are having a Sweek Peak Week! Today I am sharing my favorite! But never fear, I will have lots of mice coming to my blog with tutorials.
There are lots of adorable fall and holiday designs in this release. I've already seen them in my local stamp stores!!!!! You can also get free shipping from Stampendous until the end of July on any order over $50 and you’re gonna want WAY more than $50 worth because it’s so amazing!!!
I have other team mates showing more new release today too. Check them out....
I can't tell you how happy I am that Stampendous has released a whole new Charm Collection line!
There are butterflies, steampunk, leaves and tree, and Christmas. Plus we already have the original Charm Collection and Critter Collection.
As soon as I saw these, I immediately thought of my Media Mixage bezels by Spellbinders and my Christmas Tree! My plan this year is to make Christmas Ornaments. I am really excited!
Last week I did a tutorial on designing with resin. Here is a link if you missed it. I will be sharing my ornaments through out the rest of the year with tutorials on how you can make them too! So stay tuned :)
Be sure to see LOTS of my work in their catalog by flipping through the pages, then RUN to your local rubber stamp emporium or online store and buy TONS of their stuff. THEN come back on July 20 and buy TONS from the Stampendous Website (since those orders are filled by your local store anyway) and they have FREE shipping until the end of July on any order over $50 and you’re gonna want WAY more than $50 worth because it’s so amazing!!!
Next week we have a another HUGE Sneak Peak week..."sweek!"
I have other team mates showing more new release today too. Check them out....
OMG! It's release week for Stampendous and guess what! So is next week too! And wowsiwowwow they are wonderful! The entire team has been really busy this summer creating exciting things for the July Catalog and next weeks convention in Las Vegas.
Today I am sharing my FAVORITE background stamp!
CRR175 Leaf Background
I don't have a tutorial today...but, on August 29 I will be doing a coloring tutorial on leaves so be sure to mark your calendar :) The colors I used are in the below photo.
Be sure to see LOTS of my work in their catalog by flipping through the pages, then RUN to your local rubber stamp emporium or online store and buy TONS of their stuff. THEN come back on July 20 and buy TONS from the Stampendous Website (since those orders are filled by your local store anyway) and they have FREE shipping until the end of July on any order over $50 and you’re gonna want WAY more than $50 worth because it’s so amazing!!!
Next week we have a another HUGE Sneak Peak week..."sweek!"
I have other team mates showing sneak peaks today too. Check them out
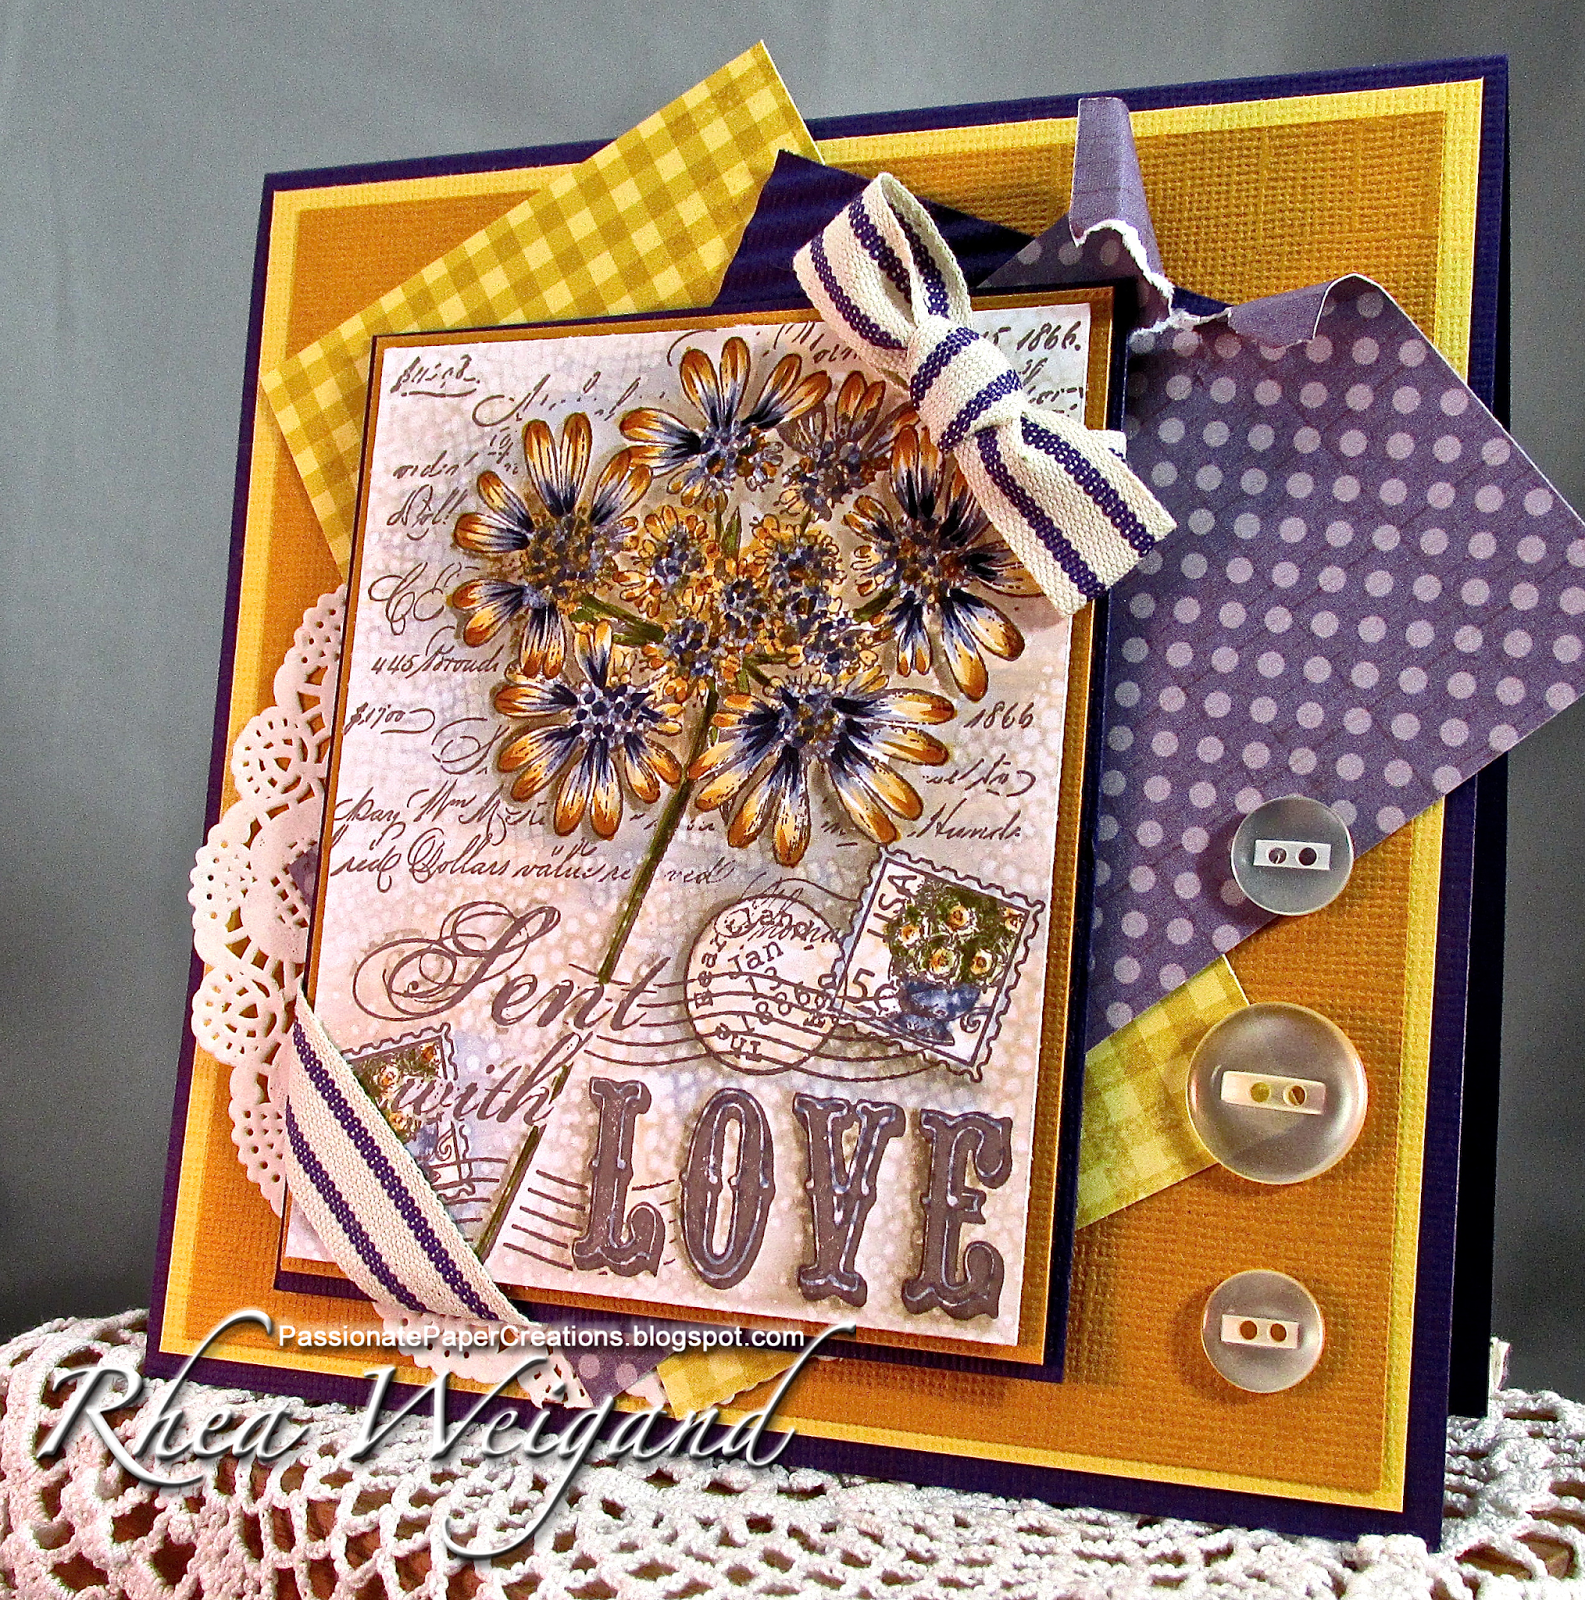
Time to start our new challenge over at 7 Kids College Fund Challenge Blog. "Anything Goes with a Twist of Vintage." But wait! This challenge can also include funky, shabby chick, distressed and altered. We still need to follow the challenge rules making sure any images are carried over at 7 Kids College Fund Store. Tab also carries a large range of trinkets to add to your vintage projects!!!
I chose Sent with Love from the Penny Black the image it's self has such a nice vintage feel to it. I colored the background with my copic markers in the E40's to give it a sepia tone feel. Then I did a lot of texturing with blending solution and a rag. I did add BV23 to tie in the colors of the flowers. I was very pleased with how it turned out.
I've also added a little resin bezel...which I will talk about more on Friday!!!!
I've been playing with resin again and lot's of it! Over the next several weeks I am going to be sharing different ideas on things you can do with my favorites Stampendous, Spellbinder's Media Mixage Bezels, and Ice Resin.
I thought I would get the resin series started with a easy project and some important tips. Yes, this is an easy project just takes time.
The most important step is sealing! You will be very disappointed when you pour your resin if you have not sealed almost everything going into your bezel. Trust me, I know :( Here are some sealing tips;
Paper - make sure it is sealed front, back and sides. Resin will find it's way into any areas not sealed. the resin will make your paper transparent or ikie looking. I like to use Fast Finish Decoupage and white glue that will dry clear. You can also use Glossy Accents or a like product such as Aleene's Paper Glaze. Clear packing tape is also popular.
Cut paper to fit inside bezel. You will do this for both the large and small circles
I used the die to fit with bezel. If you don't have dies you can ink the edge of bezel and stamp image. Then cut it out.
Picture B
With Fast Finish Decoupage seal both sides of papers. Let dry
Apply glue inside of bezel. Enough that when you smooth the paper into the bezel glue will ooze around all of the edges.
With you finger, smooth the glue as evenly as possible around the edges of the paper and bezel. This is the point where I like to dampen my finger a little. Now repeat smoothing the glue over the entire surface. Doing this reminds me of caulking the tub or sink...LOL. You are basically doing the same thing with the edge of paper and your bezel.
Let this dry completely until it is absolutely clear. I left it overnight.
Do the same process for the small circle bezel.
Picture C
Add Champagne Glass Glitter, carefully place in desired areas
Add Bronze Glass Glitter, carefully place in desired areas
Not shown is the triangle bezel. This was a last minute add to my project. It is filled 1/2 way with Champagne Glass Glitter only.
Do the same for the small circle bezel.
MIXING AND POURING RESIN - Don't be afraid of resin. It is so easy to mix and pour. The directions are simple and easy to understand. I am going to refer you to the package directions for this part :) Check out this VIDEO on using the Ice Resin Syringe.
My project has 2 layers of resin. You are at the point now where you would add your first layer of resin only filling about 1/2 of the bezel. You will set aside to cure for at least 6 hours. I always let mine cure over night. You will do the same for the small circle and the triangle bezels.
Now, we need to move onto the next step....
Picture A
For this step you will need
Cream card stock
Quilling tool
Aged Gold Embossing Powder by Stampendous
Champagne Glass Glitter by Stampendous
Now that the first layer of resin is dry we can work on the 2nd layer
Picture B
Cut very thin slivers of cream card stock about 6" long.
Quill them into swirls as shown
Cover front and back with Versa Mark. Dip in Aged Gold embossing powder.
use tweezers to hold when heating
you may want to repeat process until you have desired look
Seal the swirls with Fast Finish Decoupage. Let Dry
Picture C
Once dry, arrange swirls in the large bezel only.
Add a little more Champagne Glass Glitter to both circle bezels.
Add a little Bronze Glass Glitter to both circle bezels.
Add a second layer of resin to all three bezels
Notice how everything is magnified again!
Set aside for 6-8 hours to let cure
Once it is dry, add your rings and ribbon. It really is easy. It just takes time to dry in between each step.


 Loading Project Manager ...